0%

运用code-debug插件在VSCode中调试ArceOS(Unikernel)

code-debug是一个支持跨特权级调试的VSCode插件。在这篇文章中,我将介绍利用这个调试插件在VSCode上对ArceOS进行源代码级调试的过程。

首先我们需要下载 gdb-multiarch :

1
sudo apt install gdb-multiarch

接着我们运行一下 ArceOS,从而生成 bin 和 elf 文件. 这里以RISC-V上的单核arceos-helloworld为例:

1
make A=apps/helloworld/ ARCH=riscv64 LOG=info SMP=1 run

在 ArceOS 的输出中,我们发现了 QEMU的启动参数:

1
qemu-system-riscv64 -m 128M -smp 1 -machine virt -bios default -kernel apps/helloworld//helloworld_riscv64-qemu-virt.bin -nographic

我们将这些启动参数转移到配置文件 launch.json 中:

1
2
3
4
5
6
7
8
9
10
11
12
13
14
15
16
17
18
19
20
21
22
23
24
25
26
27
28
29
30
31
32
33
34
35
36
37
38
39
40
41
   //launch.json
{
"version": "0.2.0",
"configurations": [
{
"type": "gdb",
"request": "launch",
"name": "Attach to Qemu",
"executable": "${userHome}/arceos/apps/helloworld/helloworld_riscv64-qemu-virt.elf",
"target": ":1234",
"remote": true,
"cwd": "${workspaceRoot}",
"valuesFormatting": "parseText",
"gdbpath": "gdb-multiarch",
"showDevDebugOutput":true,
"internalConsoleOptions": "openOnSessionStart",
"printCalls": true,
"stopAtConnect": true,
"qemuPath": "qemu-system-riscv64",
"qemuArgs": [
"-M",
"128m",
"-smp",
"1",
"-machine",
"virt",
"-bios",
"default",
"-kernel",
"apps/helloworld/helloworld_riscv64-qemu-virt.bin",
"-nographic",
"-s",
"-S"
],

"KERNEL_IN_BREAKPOINTS_LINE":65, // src/trap/mod.rs中内核入口行号。可能要修改
"KERNEL_OUT_BREAKPOINTS_LINE":124, // src/trap/mod.rs中内核出口行号。可能要修改
"GO_TO_KERNEL_LINE":30, // src/trap/mod.rs中,用于从用户态返回内核的断点行号。在rCore-Tutorial-v3中,这是set_user_trap_entry函数中的stvec::write(TRAMPOLINE as usize, TrapMode::Direct);语句。
},
]
}

我们在qemuArgs中添加了 -s -S 参数,这样qemu在启动的时候会打开gdb调试功能并且停在第一条指令处,方便我们设置断点.

此外,应当注意executable参数指向包含符号表的elf文件,而不是去除符号表后的bin文件。

由于ArceOS是unikernel,没有用到用户态,因此以下这三个参数不需要填写:

1
2
3
"KERNEL_IN_BREAKPOINTS_LINE":65, // src/trap/mod.rs中内核入口行号。可能要修改
"KERNEL_OUT_BREAKPOINTS_LINE":124, // src/trap/mod.rs中内核出口行号。可能要修改
"GO_TO_KERNEL_LINE":30, // src/trap/mod.rs中,用于从用户态返回内核的断点行号。在rCore-Tutorial-v3中,这是set_user_trap_entry函数中的stvec::write(TRAMPOLINE as usize, TrapMode::Direct);语句。

最后我们再次按f5开始调试ArceOS. 我们发现Qemu虚拟机启动,ArceOS停在了第一条指令

1
oslab@oslab:~/arceos$  qemu-system-riscv64 -M 128m -smp 1 -machine virt -bios default -kernel apps/helloworld/helloworld_riscv64-qemu-virt.bin -nographic -s -S

接下来我们设置断点。比如我们在Hello, World输出语句打一个断点,然后按”▶️”.我们会发现断点触发了:
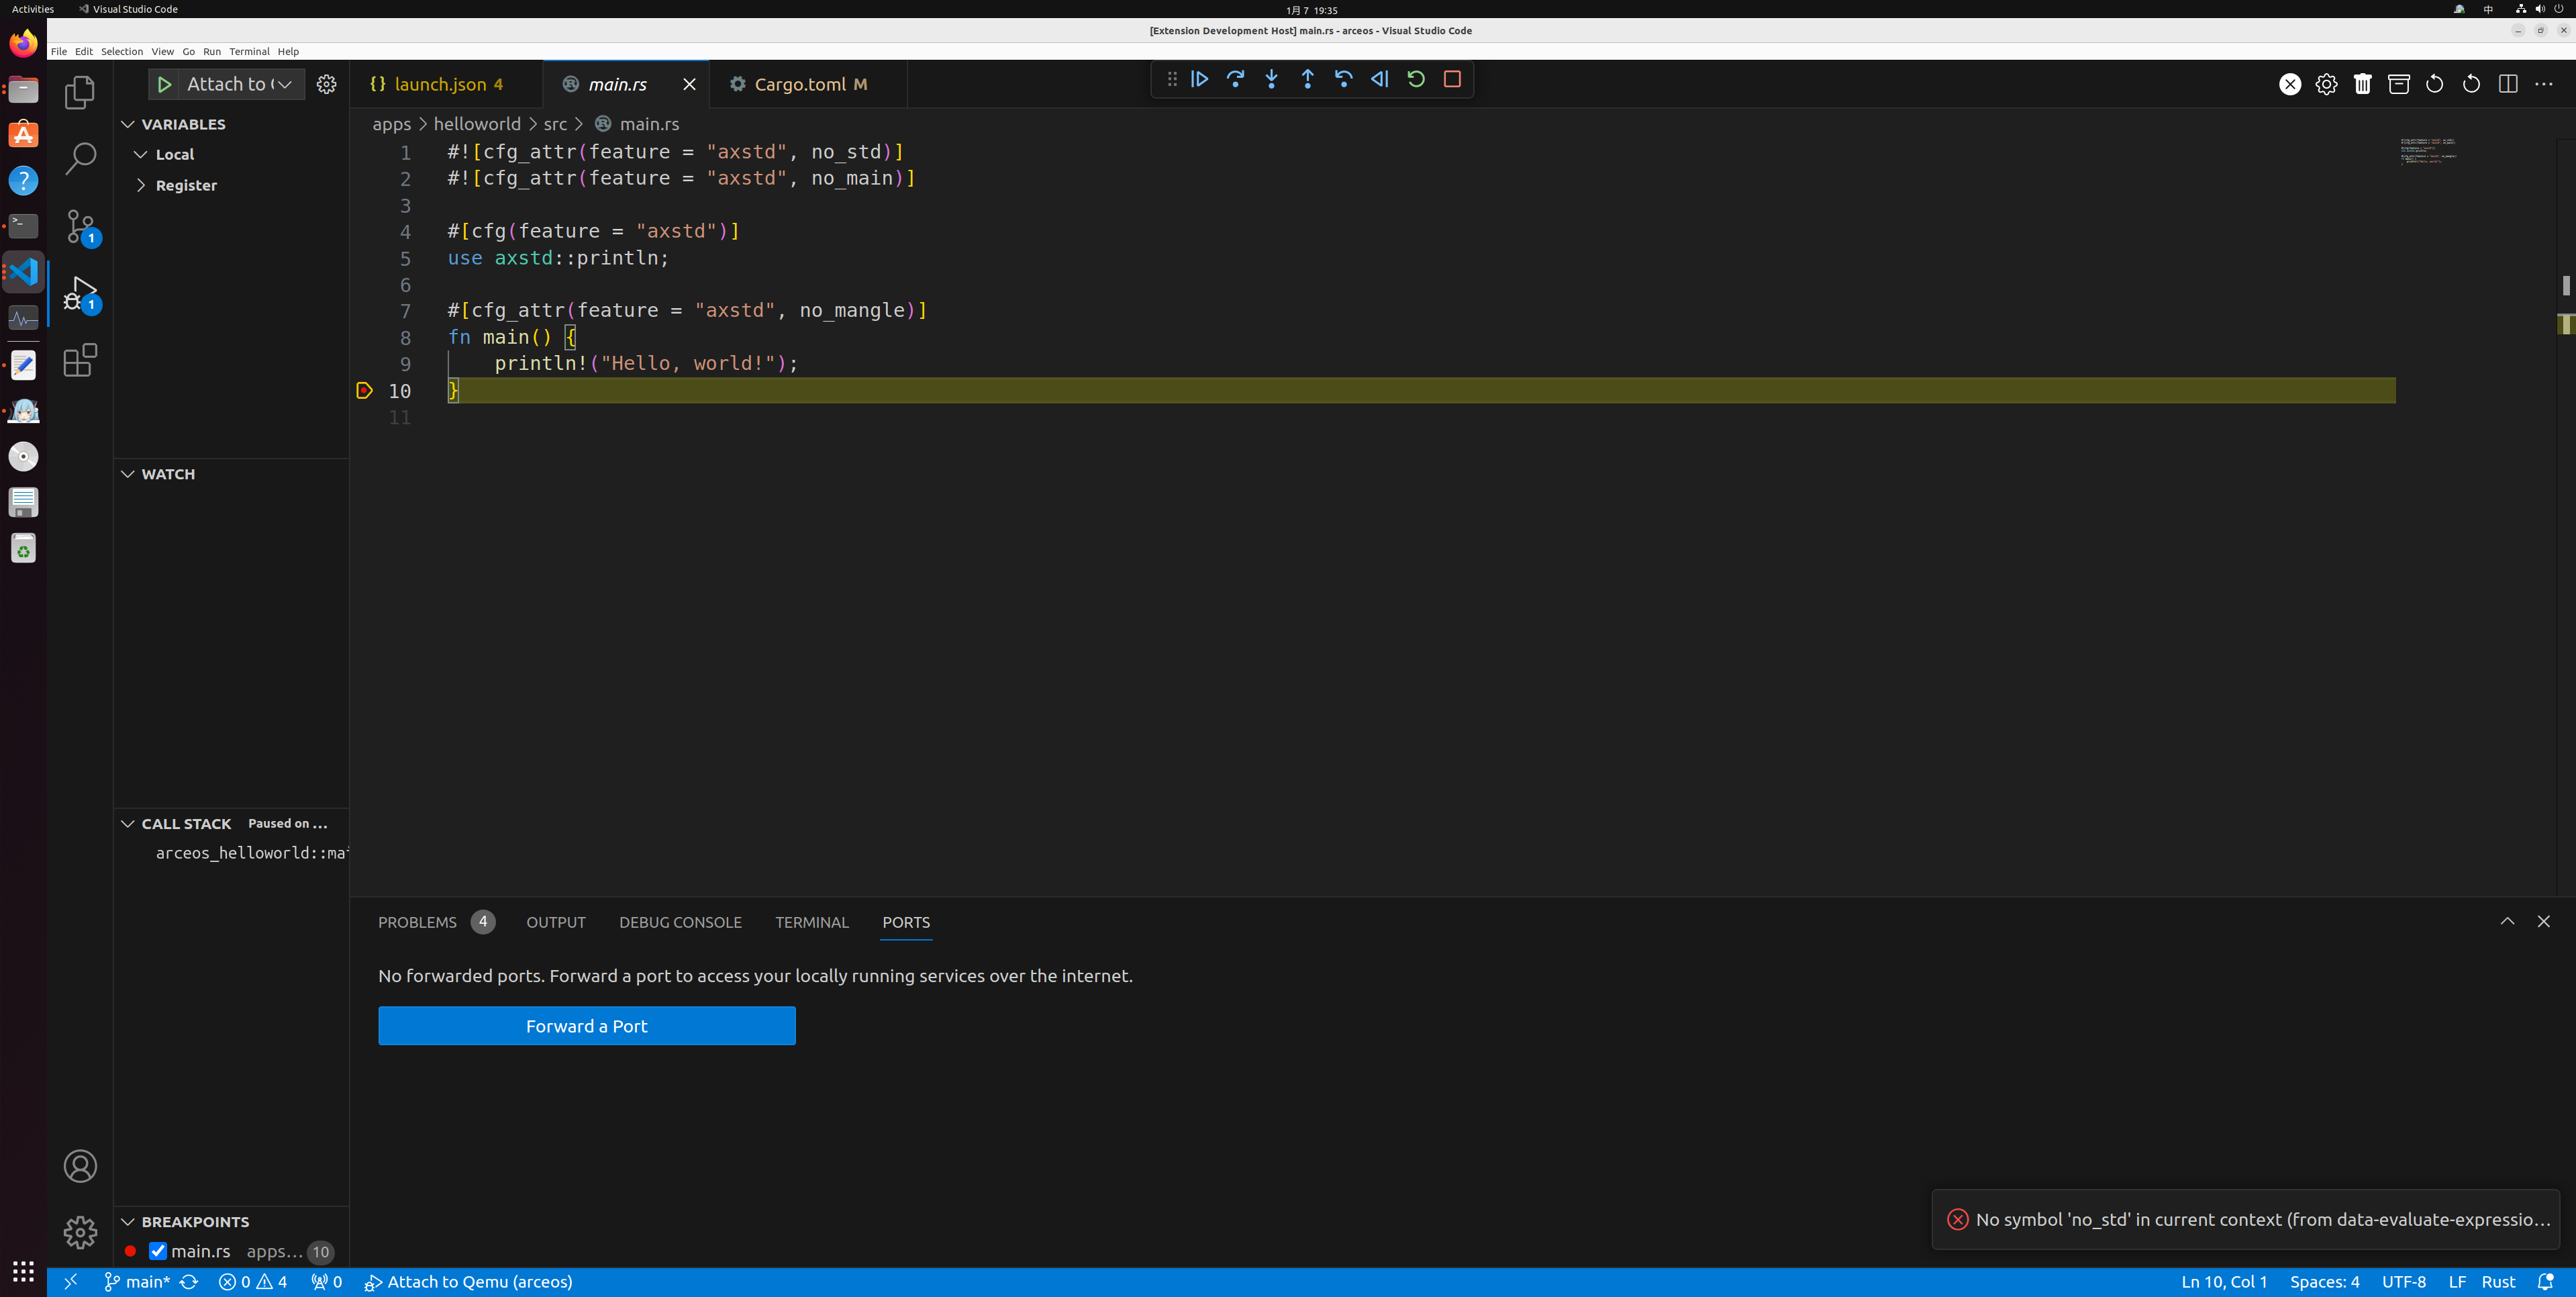
以上,通过一些简单的设置,我们就得以用code-debug调试器插件调试一个新OS.